 tháng 5 29, 2012

Step 1:
Cut 2 squares of cardstock. I used Whisper White measuring 5" x 5". Cut different patterned paper or colored cardstock in strips. I cut all of mine 3/4" wide and at least 5" long or more:

Step 2:
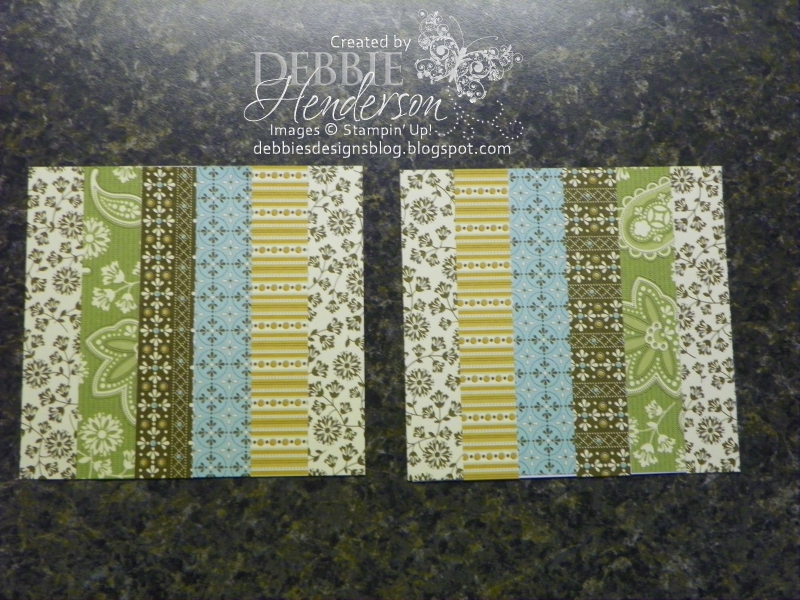
Glue your strips of paper on top of your 5" x 5" square cardstock pieces. Glue the strips side-by-side until your cardstock square is completely covered. Trim the ends the size of your squares. Make sure you complete both squares so that they are identical. Place them side-by-side and turn one square so that the patterns are opposite to each other:
Step 3:
Cut your strips in a diagonal pattern as shown below. I cut all of my strips 3/4" wide. Make sure when you cut your diagonals, that each square is going in a different direction, one square cut diagonally to the left, and the other to the right:

Step 4:
Now start matching your patterns by grabbing one strip from the left-hand side square and one from the right until you have enough for the size square you want to create. Match the diagonal patterns to create the chevron:

Step 5:
Once you are happy with the number of strips you need, start gluing them to a rectangular strip of cardstock so that they remain in place. I used a small rectangle as shown below. This will hold your strips in place until you trim everything square:

Step 6:
When all your strips are glued in place, trim off the ends to create your square. Trim the size you need. Mine turned out 5" x 3":

Step 7:
Glue to card front and complete your card:

Completed card!

Play around with different sized panels and you can also vary the thickness of your strips! Have fun!
Card Supplies:
- Cardstock: Very Vanilla
- Inks: Wild Wasabi, Soft Suede
- Accessories: Brads, Taffeta Ribbon
- Tools: Paper Cutter, Blossom Bouquet Triple Layer Punch, Sponge Daubers
- Stamps: Best Dad Ever
- DSP: Spice Cake
Just a quick reminder, we are getting so close to the date for the new catalog debut........June 1st is just around the corner!


Không có nhận xét nào
Đăng nhận xét