Good morning blog readers. Today for "Tuesday Tips or Techniques" I am going to show you how I made the double embossed background for the masculine card below that I posted yesterday:
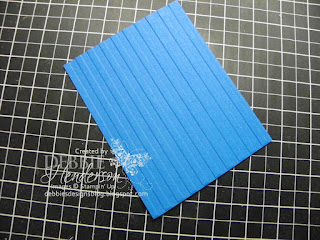
Notice the bi-directional way the stripes on my card show up-horizontal and vertical? If you click on the card sample, you'll be able to see a close-up view. I used the "Stripes Textured Impressions Folder" and this is how I completed my background:
Step 1:
You will need a piece of cardstock measuring 5 1/4" x 4" and the "Stripes Textured Impressions Folder". I used Pacific Point Cardstock for my card sample.
Step 2:
Emboss the cardstock piece as you normally would be inserting the cardstock inside the embossing folder and using your Big Shot Machine.
Step 3:
Turn your cardstock piece 180 degrees and emboss again, placing your cardstock piece on the very edge of one side of the embossing folder. This will create the 2nd set of stripes going in the opposite direction.
Because your cardstock piece is wider than the embossing folder, you will have to line-up the last embossed stripe to continue embossing the remainder of the cardstock piece. The last embossed striped is raised so it will fit in one of the "bumps" inside the folder.
Card Supplies:
- Cardstock: River Rock, Pacific Point, Tangerine Tango, Whisper White
- Inks: StazOn Jet Black, River Rock, Watercolor Crayons
- Stamps: Best Dad Ever, Countryside, Extreme Elements
- Tools: Big Shot Machine, Labels Collection Framelits, Petal Cone Die, Stripes Textured Impressions Fodler
- Accessories: Brads
 tháng 2 21, 2012


Không có nhận xét nào
Đăng nhận xét